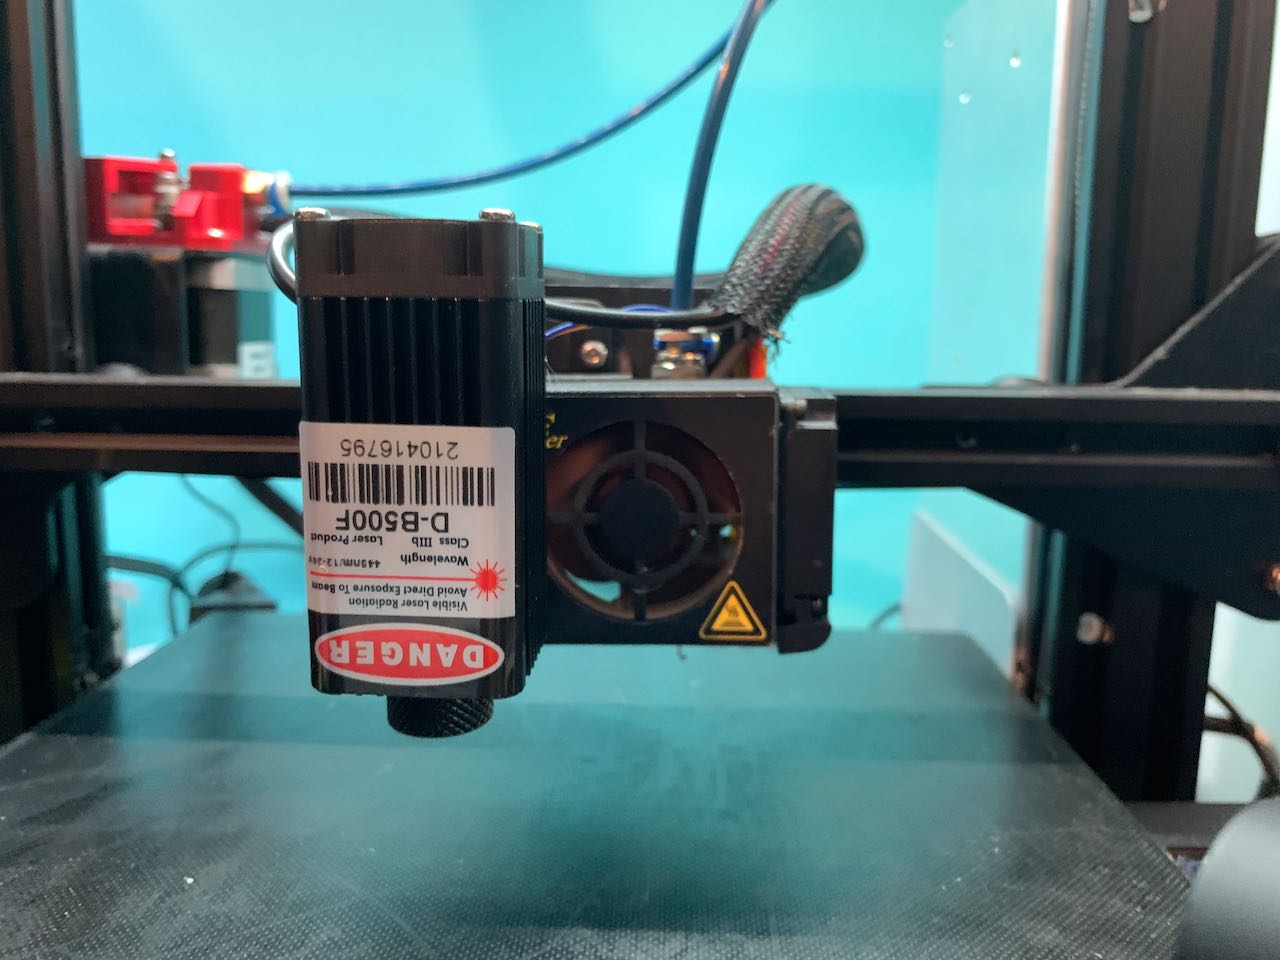
After making a few simple upgrades to my Ender 3, I started looking into further modifications I could make and came across the trend of attaching lasers to 3D printers.
Warning
Please do not take this post as an endorsement of any particular product or of using lasers in general. Lasers are dangerous and can cause serious, permanant eye damage and sight loss in a fraction of a second.
Always ensure you are comfortable, appropriately qualified and using adequate PPE when handling lasers. The kit I bought came with ‘laser safety goggles’, but I purchased my own certified pair for the wavelengths of my laser and would advise you to do the same.
Background
As this is a relatively low cost upgrade (~£25/$30) and I had never experimented with lasers before, I saw it as great opportunity. I purchased a 500mw laser from AliExpress, and chose this model as:
- It is marketed for the Ender 3, so has the mounting holes in the right locations for common laser mounts.
- It runs on either 12 or 24v. Many generic lasers require 12v, and this saves the addition of a buck converter (The Ender 3 runs on 24v).
- It’s pre-wired to a 3-pin JST connector. The importance of this will soon before clear.
Mounting the laser
Lasers geared towards the Ender 3 typically contain a set of neodymium magnets, intended to adhere to the metal fan housing. I chose to throw these straight in the spare parts box.
- When the head moves, the laser starts to move side-to-side.
- Focus is important, especially with a fairly low-power laser. This becomes a nightmare with a magnetic mount.
- I don’t want the laser falling off and injuring me or my pets.
For a more permanent mount, I started off trying a design from Thingiverse but found that this blocked my X limit switch and was slightly too flimsy. My remix addresses these issues (at least for my setup), and allows the Laser and BLTouch to coexist in perfect harmony.

Powering the laser
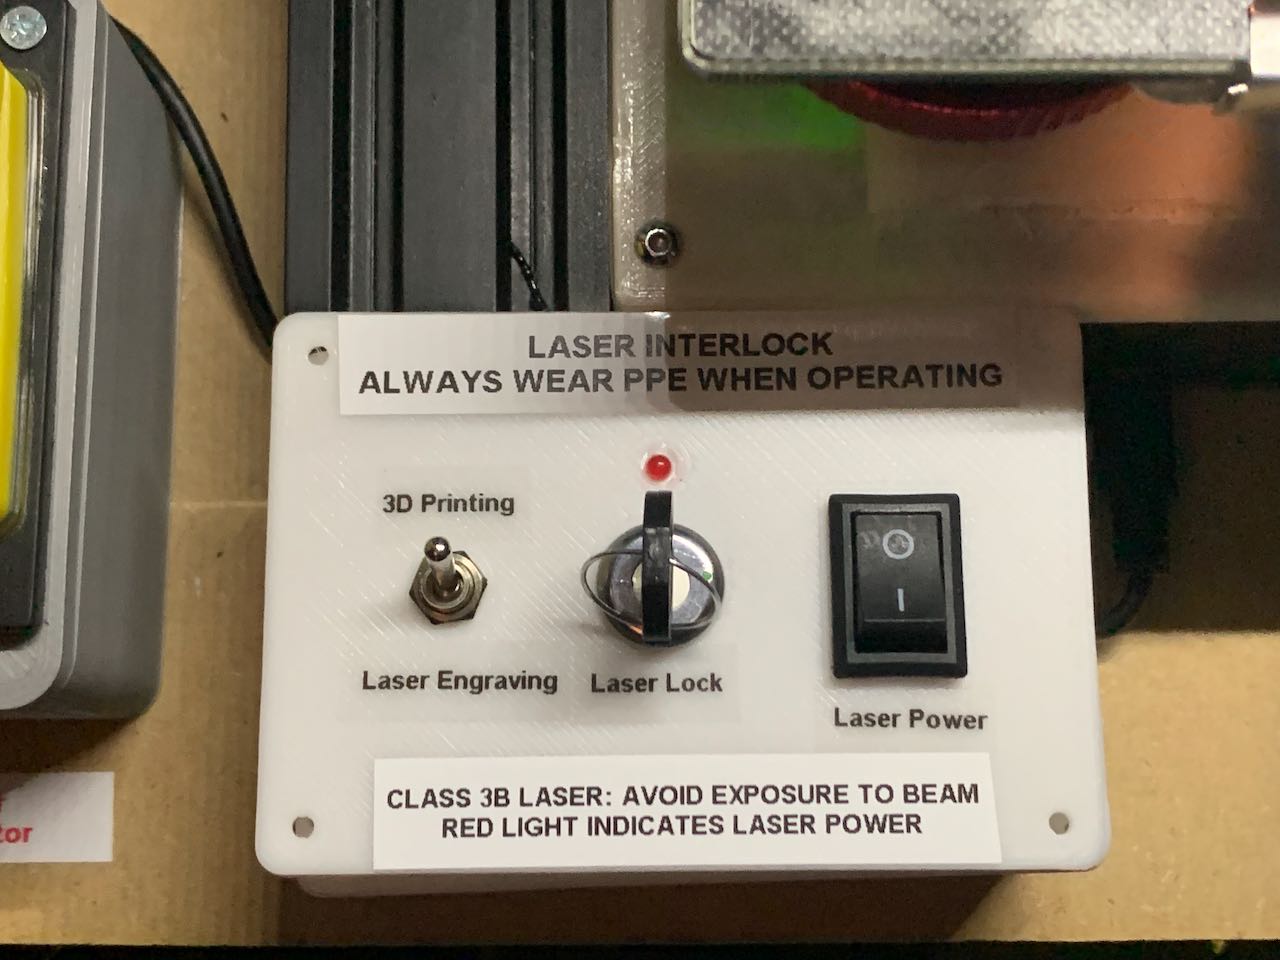
In most 3D printing applications (including this one), lasers are powered by the PWM signal from a fan header. This allows the intensity to be controlled rather than having the binary states of 0% or 100%. This does present an issue of needing a way to switch between the laser and the fan (for printing), but I made an external switcher box to alleviate this.

This PWM control is where my issues began…
The first time I tried the laser, I used a simple bit of gcode to validate its operation:
M106  ;Turn the fan (laser) on
G4 S5 ;Wait 5 seconds
M107  ;Turn off the fan (laser)
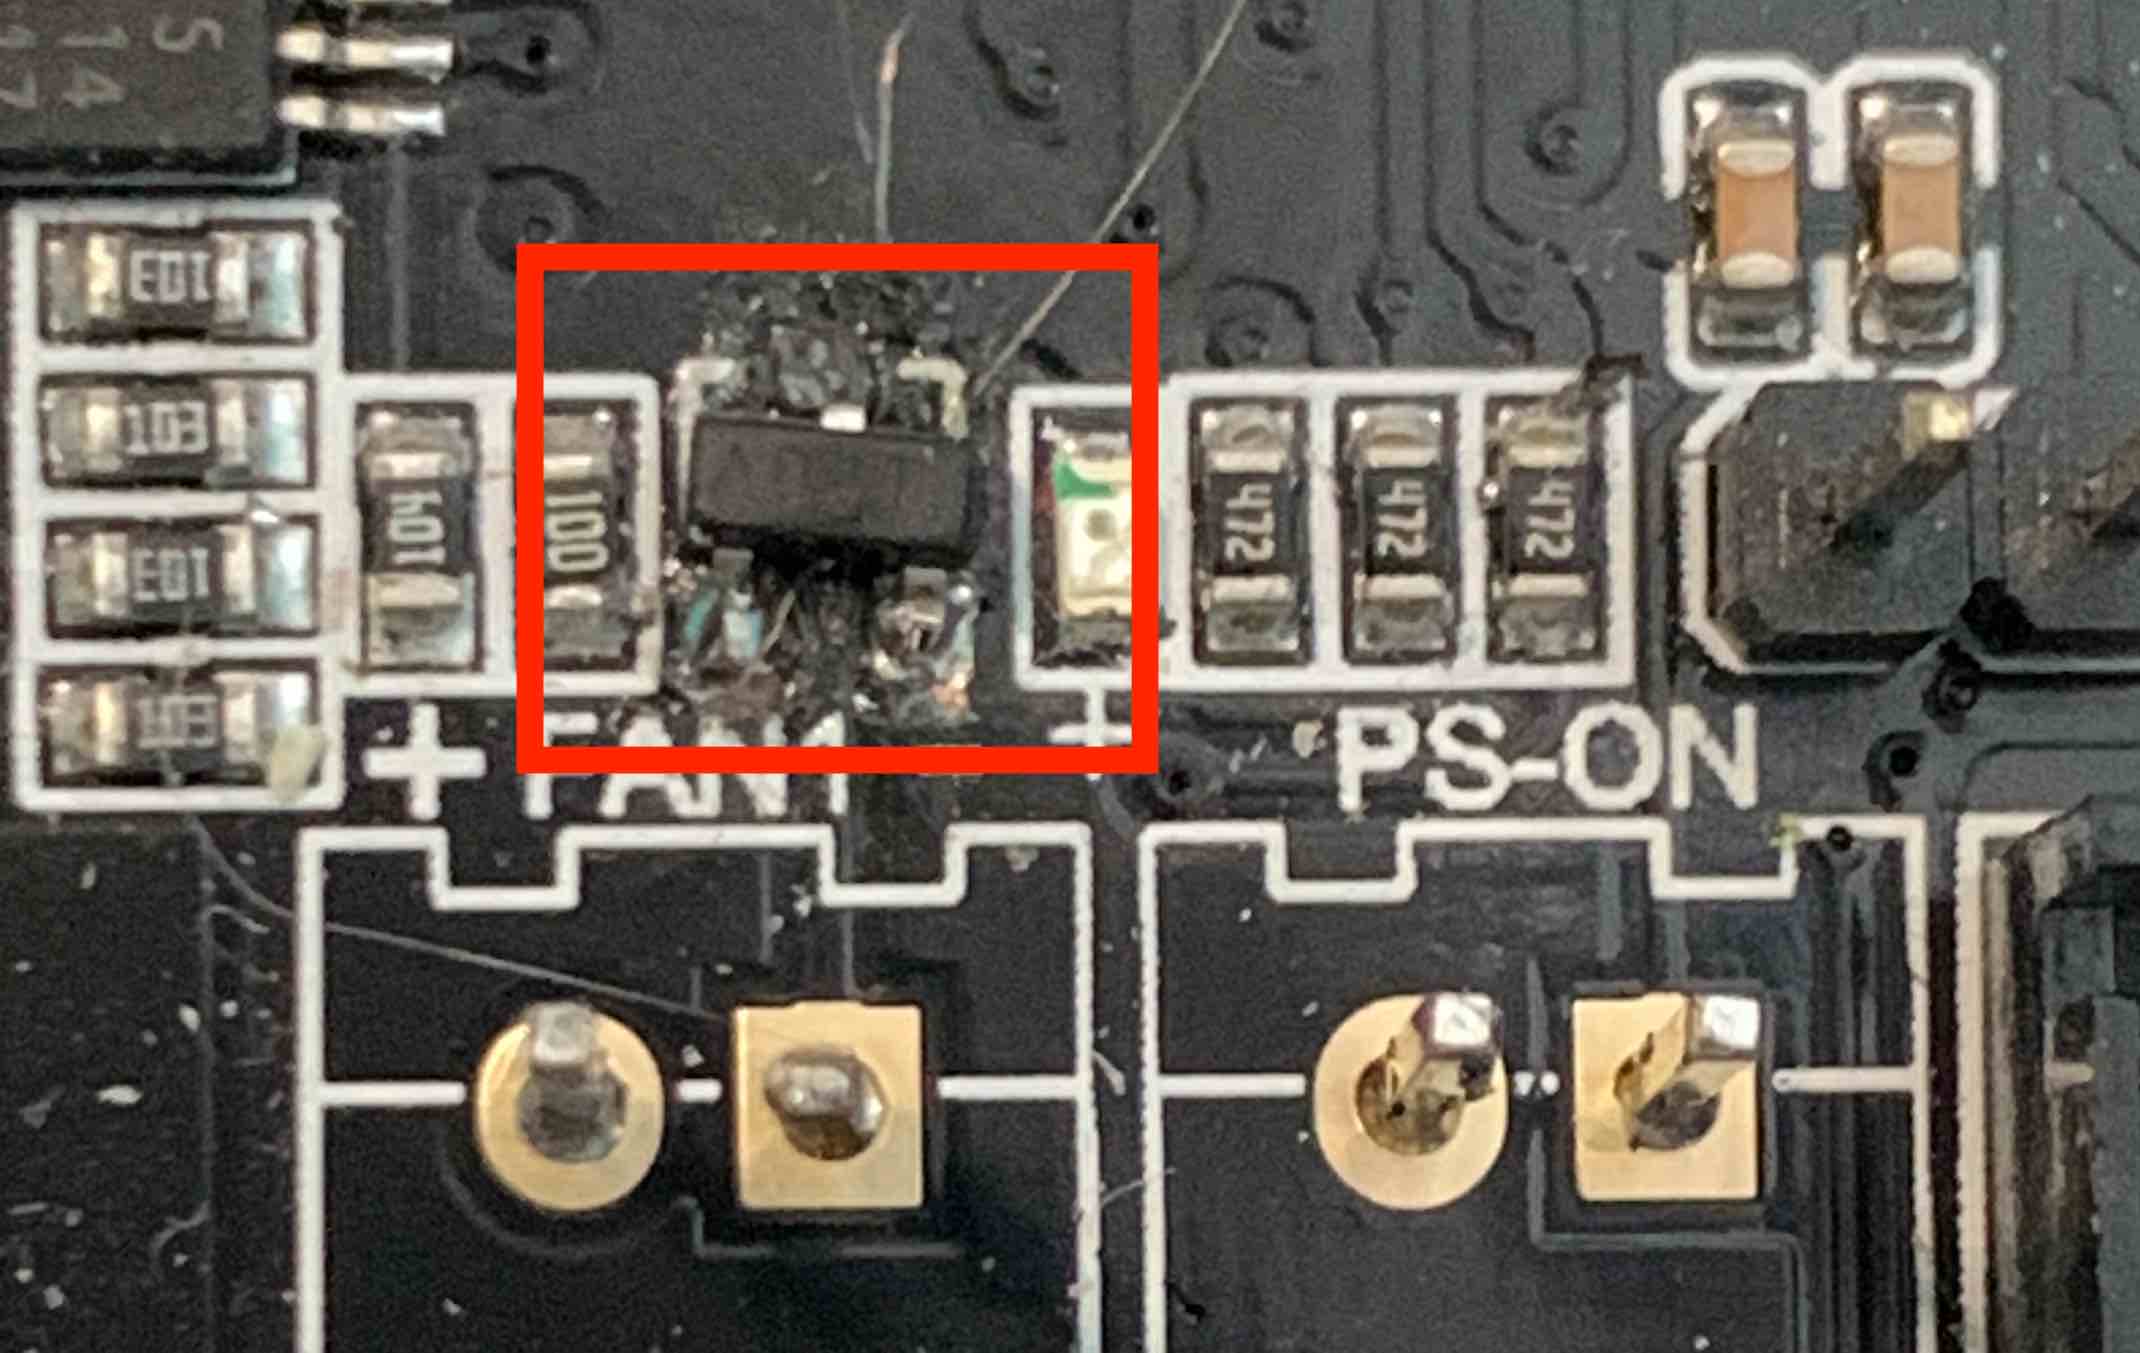
Sadly, the BTT SKR Mini (E3 V2.0) board had other ideas and the laser remained on constantly even after a full restart. The PL4009 MOSFET controlling the fan had fried itself. I then tried using the second fan header and that one suffered the same fate.
Fixing the board
The solution to my fan issues was to replace the fan MOSFETs. Although this is theoretically simple, in reality it is somewhat infuriating due to how small the transistors are.
Thankfully the schematics for my board are available over on GitHub and I opted for the AO3400 as a replacement. These are specced higher than the originals and very cheap.

Now although I’m not going to win any awards for my soldering, this did solve the issue and now I’m able to use the laser correctly. I used a TS100 with a C1 tip.
Verdict
From reading various forums it seems as if the fan MOSFET blowing is a common issue with these boards, even when just using the header to drive a fan.
Although this was an unexpected hurdle to using the laser, I still see it as a worthy time-investment if you have the patience to get everything working. Its already come in useful for making gifts and signage.
I’m planning a guide on laser path generation with Inkscape soon as when I started I struggled to find a guide that fully explained the process.